WELL, after several years of planning, and on-again / off-again work, I was finally able to complete my telescope making project. First light came on March 25, 2003 in Madison, WI. It was a clear, crisp, and calm spring evening, and I was in awe at the stunning views of Jupiter. Even at highest power (4.8mm Nagler - 253x magnification) and with little cool-down time, the image did not degrade. The Great Red Spot was clearly visible, and I could even detect a hint of detail (eddies) in the two main dark bands of the planet. To understate it......Wow!
This is my second telescope. My first was a Celestron 8" SCT purchased from Lumicon when I used to live in the Bay Area of California. That was a wonderful instrument. However, when I bought it, I did not yet have children and was living in a climate conducive to easy year-round viewing. With two young daughters and a relocation to Madison, Wisconsin, I found myself observing less and less because I was more tired at the end of the day once the kids were in bed and because the weather was much colder on optimal viewing nights. The bottom line is that it took a lot more "umph" for me to saddle-up and get all the gear outside. So, I sold that scope to my good friend Bob out in California and set down to design a scope more in tune with my current lifestyle. The scope that I made above after a lot of consideration and study is a 6" f/8 Dobsonian-mounted reflector. In the beginning (about 3 years ago), I wanted to fabricate my own primary mirror. I purchased the blank and all the necessary grinding powders from Newport Glass. After making my own grinding stand and setting aside an area in my basement, I set to work. I actually made it practically all the way to the figuring stage and produced my own Foucault tester to help me hone the optics into the desired parabolic figure. But alas, the process began to become more tedious than I had expected. The lack of a good thermally stable place to test the optics in combination with my need and desire to spend time with my family led to a situation in which I could proceed no further comfortably. And so, I boxed up my almost completed mirror for a future time where my attentions and resources will permit me to reach the end product. Having to stop production put me in a bit of a funk and stalled my desire to continue for a couple of years. But I finally kicked myself back into action several months ago by deciding to purchase my primary mirror from a vendor. I chose University Optics (unfortunately no longer in business) in Ann Arbor, Michigan. The mirror arrived in short order and away I went. I built my optical "tube" out of half-inch baltic birch plywood and used 3/4" plywood for the rocker box base. The primary mirror cell was designed and fabricated out of 3/4" aluminum plating. The design is based on one described in Richard Berry's book, Build Your Own Telescope. I am very proud of my efforts here. Although this cell may seem like overkill, it is ROCK solid. Collimation is simple and firm. The spider and elipitical secondary (1.52" minor axis) were purchased from ProtoStar in Columbus, OH. I installed an NGF-DX2 2" JMI Crayford focuser, and a TeleVue Starbeam finder. I also installed NGC-microMAX digital setting circles from JMI. The Starbeam finder and digital setting circles enable easy finding capabilities. Here are some pictures and descriptions of my scope during production and after completion. It was a very long process (about 4 solid months of pure construction....don't even ask how much I perseverated during the several-year planning period). But it was well worth the effort and wait.
It is important to thank a few folks, since I owe the completion of my scope to their support and aid. Mike Clayton constantly kept my desire fire stoked by asking about my progress, urging me forward, and maintaining the confidence in my abilities to see this thing through. Jeff Vogtschaller was tool man extraordinaire, schooling me in the power of power in terms of tools; a man of whom Red Green would be proud. And finally I would like to give my dear thanks to my wife Jean. Although the cosmic passion does not jazz her to the same extent as me, she recognized its importance in my instance and gave her unselfish support over all those long nights that witnessed me grinding, gluing, drilling, measuring, hammering, sawing, filing, and on and on in the depths of our basement below. She is a treasure as great as the worlds now in reach again above.
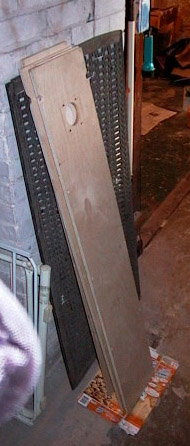 The optical tube boards prior to assembly
 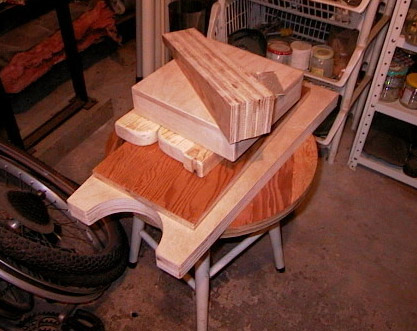 The rocker box pieces prior to assembly
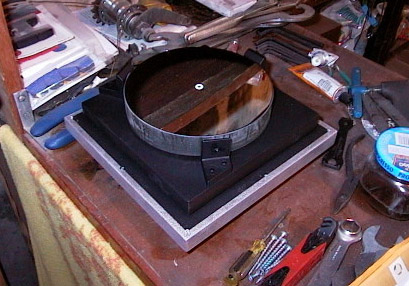 The mirror cell with the primary in place
 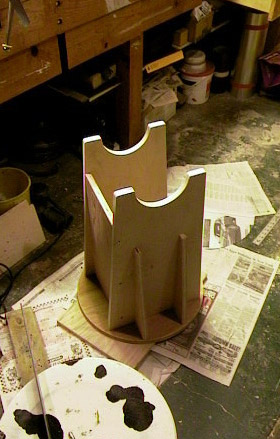 The assembled base. Just needs paint.
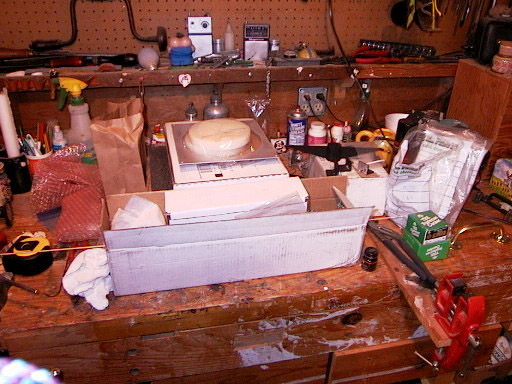 My work area with lots of parts present
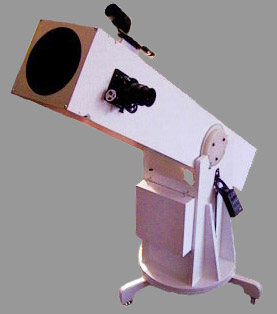
  The completed scope
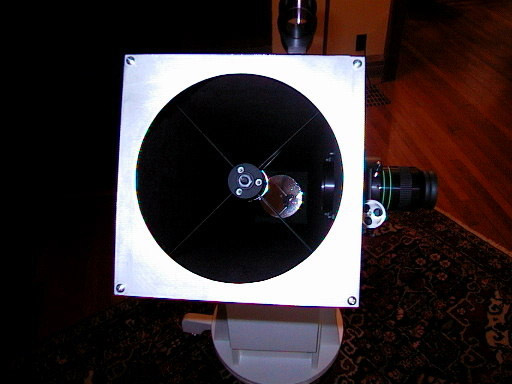 Looking down the optical tube
 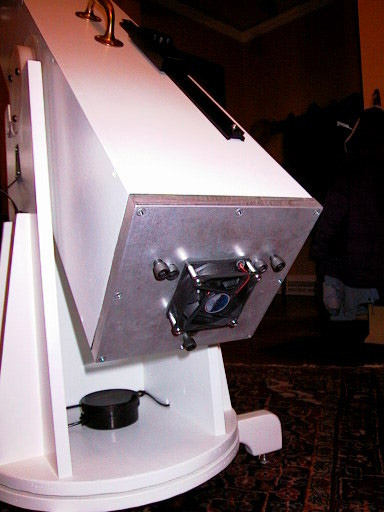 The back end. Note collimation bolts, and cooling fan
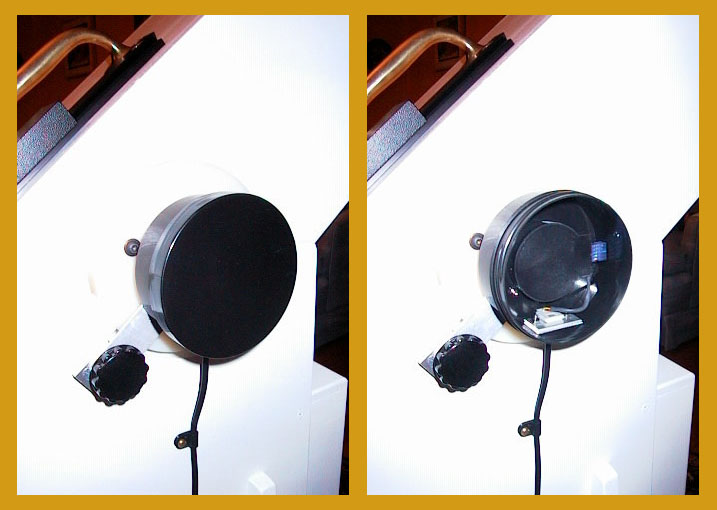 The altitude encoder in its protective housing made out of a plastic bulk 35mm film canister. This was done for both JMI encoders.
Although I designed my telescope almost strictly for viewing, I still have the capacity to capture planetary photographs that don't require tracking. This makes for a fun photographic exercise with results that can be quite satisfying for the little effort needed. Here are some of photos that I took on April 8th, 2003 using my digital camera and afocal projection technique. In this method, one just aims the camera at the image that is projected out of the telescope eyepiece. It is an simple but tricky procedure because it is difficult to align the optical paths of the camera and telescope when they are not physically connected. Moon shots 1 and 2 were taken with a 20mm plossl, and 9mm Nagler, respectively. This 6" telescope has a 1215mm focal length. For the plossl photograph, I used a moon filter (neutral density filter) on the eyepiece. The comparison photo that accompanies "Moon 2" is included to give you a feeling for scale. For that comparison photo, I have also place "x"s at the approximate locations for the Apollo 11 (first) and Apollo 17 (final) landing sites. The Jupiter shot was a lucky hit using afocal projection and the 9mm Nagler. I blew that image way up and increased the resolution in Photoshop in order to cut the pixelation a bit. I was quite surprised that I managed to capture bands on the planetary surface. I took the picture of Venus transiting the Sun's disk on June 5, 2012 using afocal projection and a solar filter over the front of the scope's aperture opening.
 Moon 1
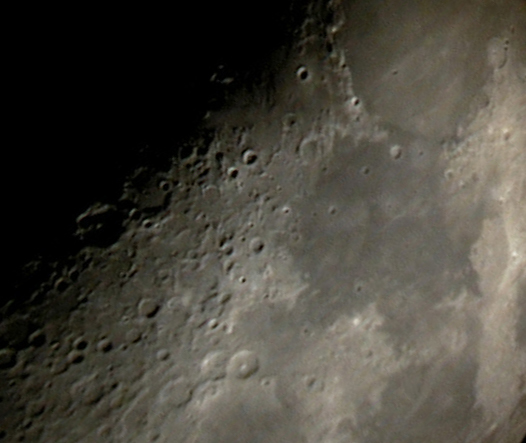 Moon 2
 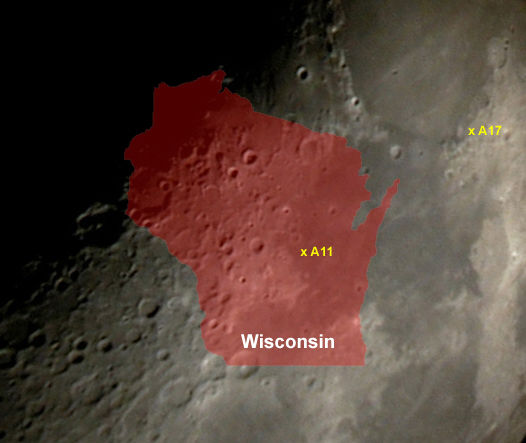 Comparison
 Jupiter